Garden Dyes Oversized Tote Bags

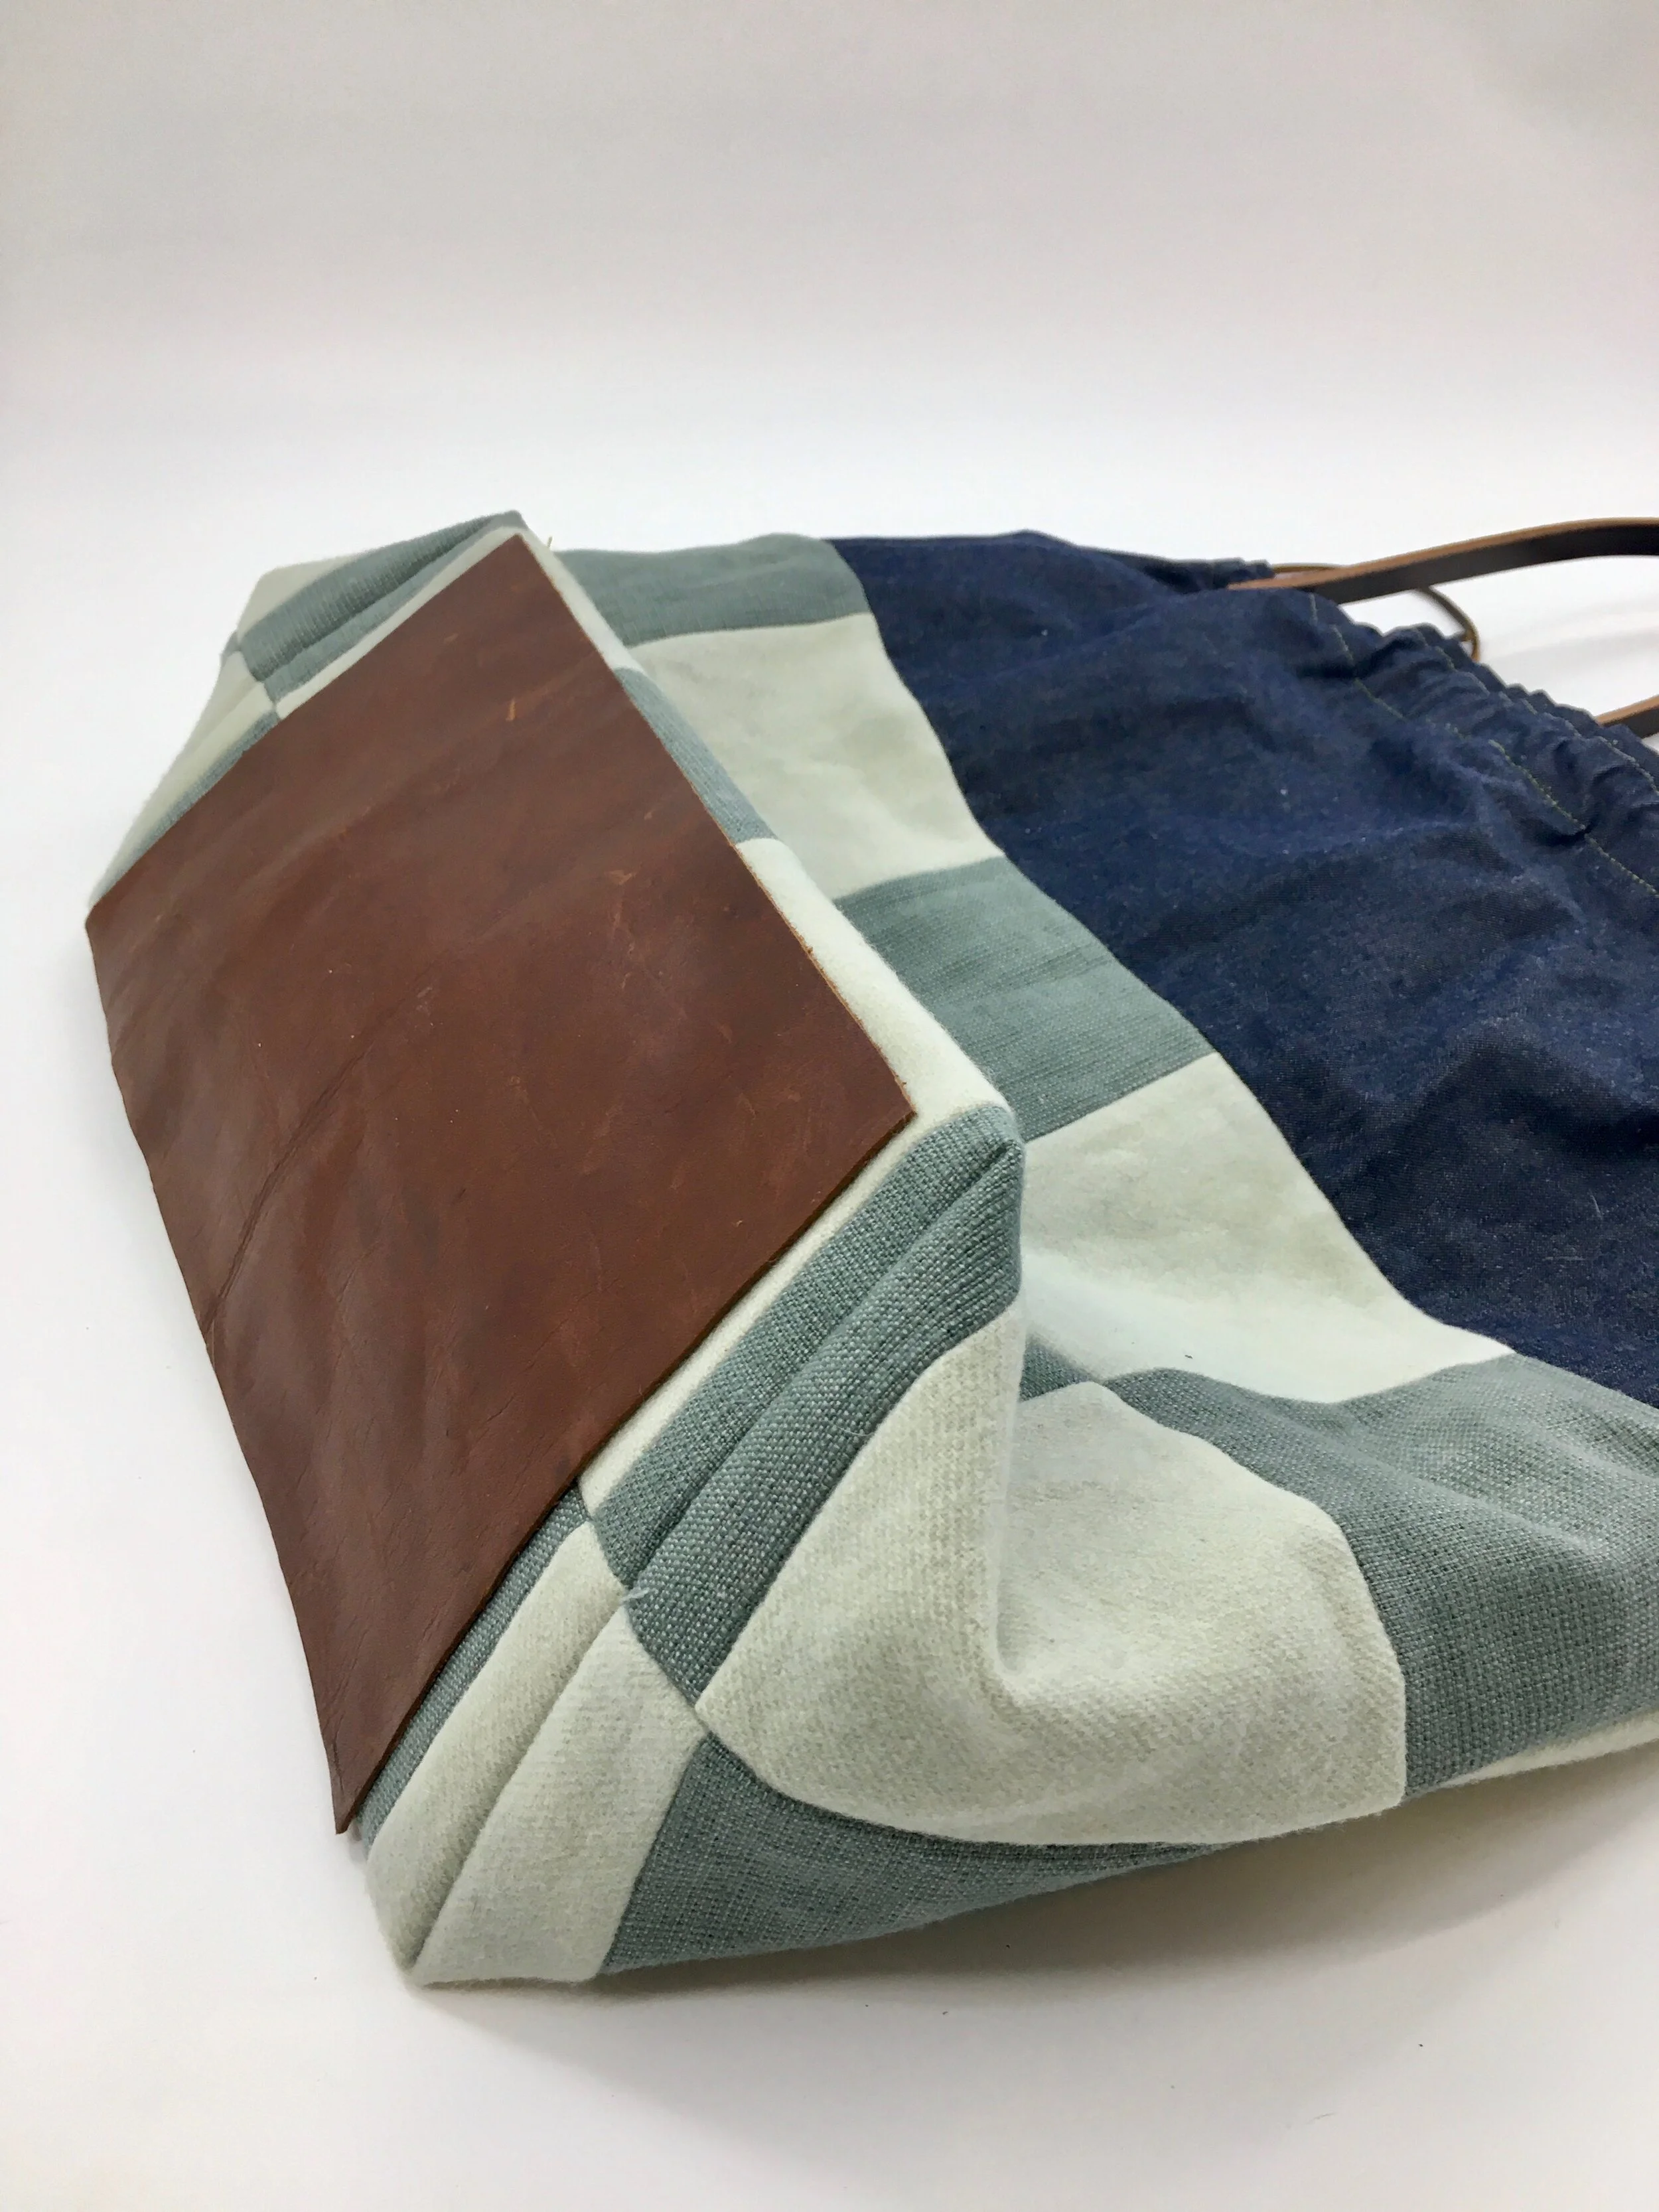
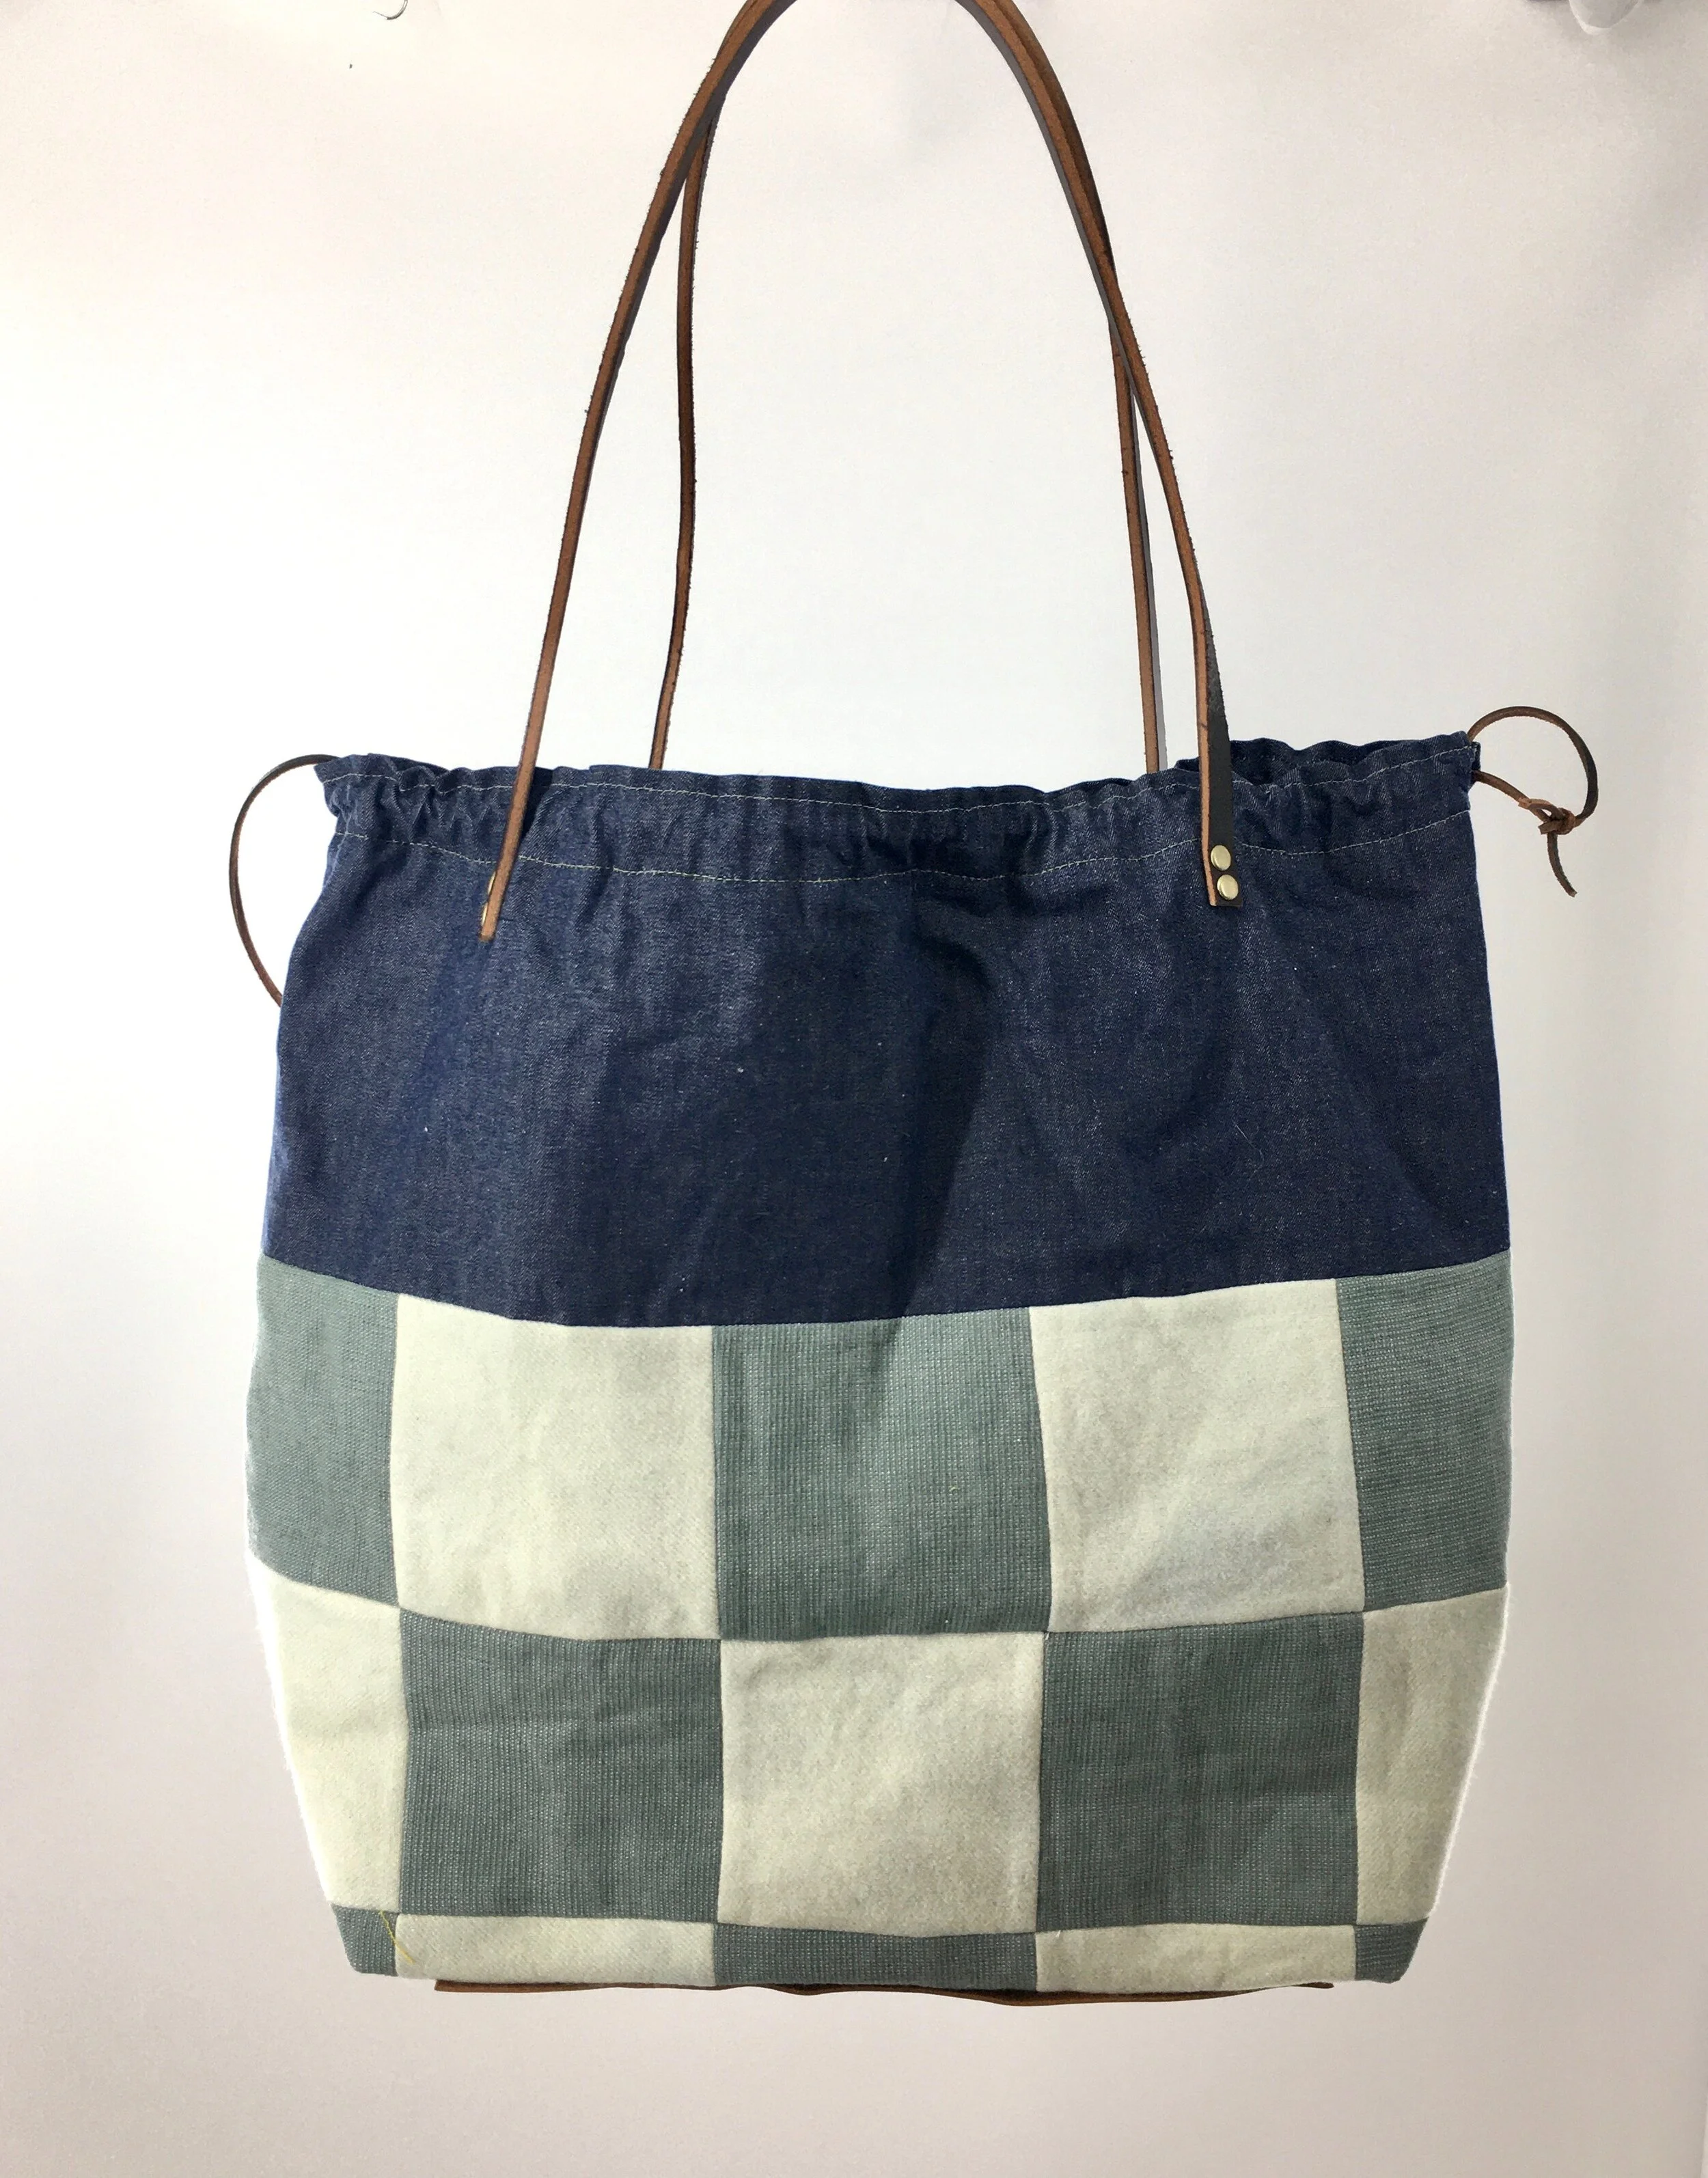
This past summer, I experimented with growing some common garden plants that work well for natural dyeing. These bags are my first attempt at using garden dyestuff: the bag on the left is made of Pendleton wool shirting scraps dyed with marigolds, and the bag on the right is made of the same Pendleton wool, dyed with red cabbages, and coupled with linen fabric from my stash.

Materials:
Pendleton Wool (naturally dyed with red cabbage or marigolds)
Stash fabric (green bag)
Merchant & Mills Dry Oilskin in Denim
Lining fabric (stash linen for the Marigolds bag, silk noil dyed with red cabbage for the Cabbages bag)
Fusible interfacing (lightweight used for the Marigolds bag, heavier-duty craft fuse used for the Cabbages bag)
Leather straps
Leather cording
Leather rectangle for bottom panel
Matching thread
Equipment:
Leather glue
Rivet setting equipment (optional)
Leather sewing needle
Scissors
Ruler
Instructions:
1. Cut 30 5”x5” squares. Sew with ¼” seam allowance in six rows of five. Press seams open. This is the bottom body of the bag.
2. Cut interfacing to match the dimensions of the bottom body and iron on.
3. Cut two 9.5” x 22.5” rectangles of oilskin. Sew with ¼” seam allowance to the two shorter sides of the bottom body. Press seams open. This is the bag body.
4. Fold the bag body in half so the two shorter ends touch. Sew the two long sides together with ½” seam allowance, starting 3” from the open short end (so that the top 3” of the bag body are left unsewn). Sew down 1/2” hem on the 3” open edges, to match the seam allowance. Backstitch at beginning and end of all stitching.
5. Box bag body corners at 3 ½” from the end points of the corners. Cut off extra fabric. Turn bag body right side out and poke out corners.
6. Cut one piece 22.5” x 43” for lining. Fold in half with two short ends touching. Sew up two long sides with ½” seam allowance. Box corners at 3 ½”. Leave lining inside out.
7. Place lining inside bag body. Line up side seams and pin, with top of lining 3” from top of bag body. Pin lining all the way around 3” from top of bag body. With thread that matches lining and bobbin thread that matches oilskin, and a longer stitch, baste lining to bag body, stitching right at top of lining.
8. Fold oilskin edge ¼” to WS, then fold down 1 ½”. Pin in place. Stitching from the outside of the bag, stitch into place with contrasting thread, following the previous stitch line. Then stitch again ¼” from the very top edge, to create a channel for the drawstring.
9. Thread leather cording through channel (one piece for each side). Tie ends together. Pull carefully (too much pressure and cording may snap).
10. Sew leather straps 4 – 4 ½” from bag sides, making sure to sew in place below channel. Alternatively, secure in place with metal rivets.
11. Glue leather panel to base of bag with leather glue.